When my soon to be Mother-In-Law suggested I try to make my own flowers for my wedding cake, I thought she was insane. She was already making and covering the three-tier cake, so I thought I would just buy some professionally made flowers to decorate it with. After visiting several cake shops and finding nothing that I even remotely liked, I decided to give it a try. ‘What the hell!’ I remember thinking, “if I mess them up I can always go and buy some!”
So I got myself some pre-made icing from the supermarket and started playing around with it. After trying a couple of roses out, I decided that yes, I was going to give it a proper go, and went to my local cake supply store (Big Bubble, Midland) and bought a slab of Fondant Icing and a container of gelatine crystals, as well as some flower stamens. Luckily my Almost-Mother-In-Law already had all the decorating tools from a class she had taken some years ago.

The materials…
Depending on how many flowers you need to make, the amount of icing you need will vary. I made around 30 flowers of varying sizes and used about 1kg of fondant icing. Remember, there is some wastage so better to have too much than not enough!
A container of gelatine powder, which should also be from the cake decorating shop. One little container should be plenty.
A piece of foam, to dry the flowers on.
A piece of perspex/plastic to work on (something the icing wont stick to).
Greaseproof/baking paper for drying the flowers on and assembly.
Clingwrap for wrapping extra fondant.
Small scissors (like nail scissors) and tweezers.
Something pointy and smooth, like a wooden or plastic skewer.
Icing sugar, for dusting.
Royal Icing, for assembly. I made this by adding icing sugar and egg white together until you get a nice, stiff consistency. This can also be kept between flower-making sessions by covering with clingwrap.
Decoration – I used stamens and edible gold dust.
Small paintbrush for painting the gold dust on.
Something to hold the assembled flowers while drying – I used baking tins for mini tarts.
Florist wire and foam.
The method for roses…
The first thing I did was cut of a piece of fondant icing, around 500g. Make sure you wrap the rest up tightly so it doesn’t go hard!
Then I kneaded it and rolled it around until it became pliable and soft. Once this was done, I added half a teaspoon of gelatine powder to the middle of the pile and gradually worked it in. Occasionally pockets of powder burst out, so be careful with it!
Once it was all mixed in, I started separating off little balls of mixture, for each petal.
The formula I used was six large, five medium, and three small petals for each rose.
Each little ball of icing I would roll around in the palm of my hand and make it soft, and then start to flatten it out with my other finger (making sure to keep some icing sugar nearby for dusting, otherwise they stick!). While flattening it out I made sure to push it into a petal shape, with a rounded edge at one end and a point at the other.
Once the petal shape was formed, I would lay the petal down over my thumb to cup it slightly, and pull the curved edge backwards.
For every second flower I made, I would also crinkle the edges of the petal, for some variation.
Once this was done, I would place the petal down onto a piece of foam, for it to dry. Every couple of minutes I would gently press a finger in to the petal to maintain the cup shape.
Once the flower was basically hard I would shift it across to a sheet of baking paper to dry out further.
Once all the petals were dry (an hour or two) I then began to paint the edges with the edible gold dust, by mixing the dust and a small amount of water together. I went about ¾ of the way around each petal, missing only the pointed end.
Once all the petal were painted I would leave them to dry completely, overnight.
After the petals are all completely dry, assembly can begin.
You need to get your tart tins or whatever you are using to hold the flowers while assembling (something round and shallow) and line it with a circle of baking paper in a cone shape.
Then you need to put a dollop of royal icing in the bottom of the cone (about half a teaspoon).
Starting with the larger petals, arrange them to overlap each other in a circle around the edge of the royal icing.
Then the medium sized petals, sticking them into the icing making sure they overlap. Then the last, tiny petals need to go into place. Make sure the petals are angled out so that you can see into the middle of the flower. Using tweezers, insert stamens into the royal icing in the middle, having first cut them to whatever length you want (I had mine quite short).
Quickly make any last minute adjustments to the placement of the petals, before the royal icing sets.
These flowers need to dry out completely before you can attach them to a cake.
I would want to leave them for at least a couple of days, so don’t leave this until the last minute!
Once they are completely dry, you can store them in a box or container and wrap them in tissue paper.
Be careful with them! They are fragile.

The method for bell flowers…
These little fillers made my cake a thousand times better than if I had just had the roses. They filled up all the gaps and covered cracks in the icing wonderfully.
They are also quite easy to make, but you need a lot of them so again, don’t leave it to the last minute!
You need to start with little balls of icing again, whatever size you want but mine were quite small, about the size of a pea.
Work the ball into a cone shape and then insert your pointy object (skewer etc) into the wide end of the cone. Roll it around inside the cone to thin out the edges, until your cone is hollow.
Fold over the edge of a piece of florist wire (maybe 3mm) and poke the wire through the cone so the folded bit is in the centre. Work the icing around this so it stays in place.
Then, using your little scissors, cut five snips evenly into the wide part of the cone to make five petals. Snip the corner off each petal so the flower resembles a star.
Using your fingers, smooth the edges of each petal and flatten them out.
Quickly poke a stamen (again cutting to the required length) into the centre of the flower and roll the end around between your thumb and forefinger to make it stick. I found this part required a bit of extra icing sugar to make it work!
Then you can poke the end of the wire into the florists foam to keep the flower up in the air to let it dry.

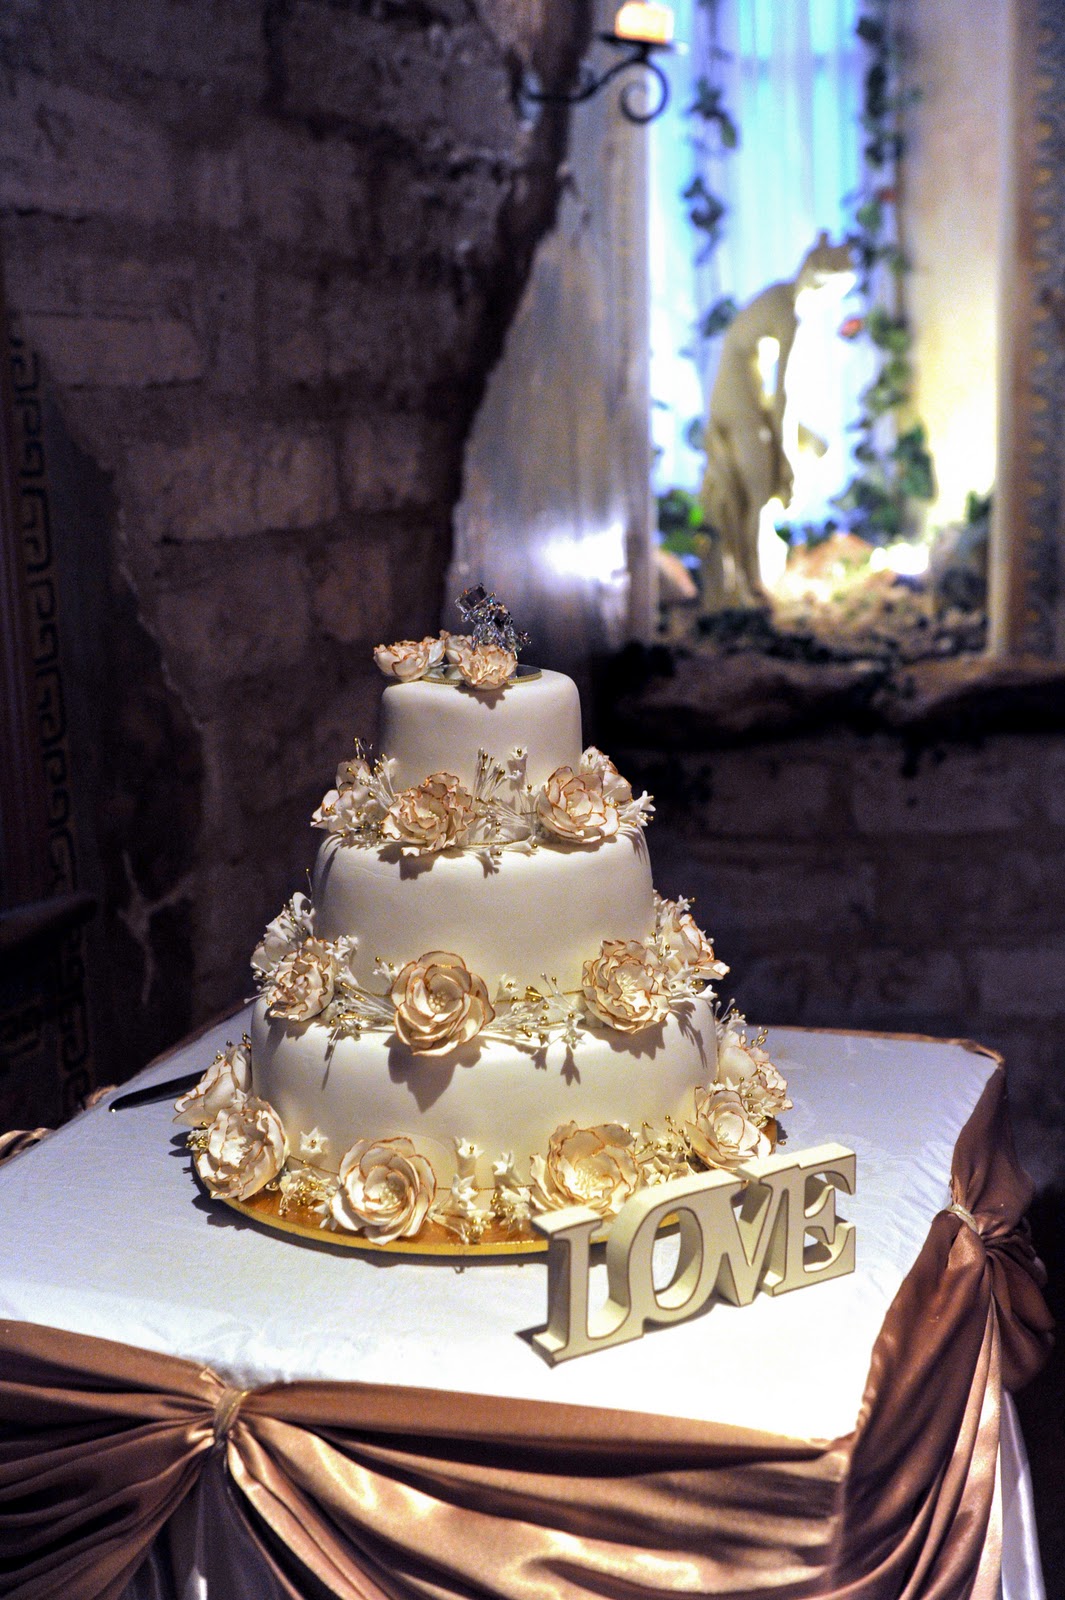
Basically, I just arranged the flowers on the cake as I wanted. I put the roses around the edge of each tier, alternating between smooth edged and crinkle edged, trying to keep the gaps even but also trying to cover any flaws in the icing of the cake.
I secured these in place with Royal Icing.
For the filler flowers I had twisted them and some spare stamens together to make little bunches, and attached them behind the roses so they poked out and filled the gaps.
Some of these I left floating in midair, some I stuck the flowers to the sides of the cake.
I had also made some miniature roses with only two circles of petals for the very top tier, which I arranged around my cake topper. And that was it! A beautiful, elegant cake and it had only cost us around $150-$200, including all the ingredients to make the actual fruit cake, cake tins, marzipan and icing, as well as all the materials for the flowers.
You cant beat that!


So I got myself some pre-made icing from the supermarket and started playing around with it. After trying a couple of roses out, I decided that yes, I was going to give it a proper go, and went to my local cake supply store (Big Bubble, Midland) and bought a slab of Fondant Icing and a container of gelatine crystals, as well as some flower stamens. Luckily my Almost-Mother-In-Law already had all the decorating tools from a class she had taken some years ago.
The materials…
Depending on how many flowers you need to make, the amount of icing you need will vary. I made around 30 flowers of varying sizes and used about 1kg of fondant icing. Remember, there is some wastage so better to have too much than not enough!
A container of gelatine powder, which should also be from the cake decorating shop. One little container should be plenty.
A piece of foam, to dry the flowers on.
A piece of perspex/plastic to work on (something the icing wont stick to).
Greaseproof/baking paper for drying the flowers on and assembly.
Clingwrap for wrapping extra fondant.
Small scissors (like nail scissors) and tweezers.
Something pointy and smooth, like a wooden or plastic skewer.
Icing sugar, for dusting.
Royal Icing, for assembly. I made this by adding icing sugar and egg white together until you get a nice, stiff consistency. This can also be kept between flower-making sessions by covering with clingwrap.
Decoration – I used stamens and edible gold dust.
Small paintbrush for painting the gold dust on.
Something to hold the assembled flowers while drying – I used baking tins for mini tarts.
Florist wire and foam.
The method for roses…
The first thing I did was cut of a piece of fondant icing, around 500g. Make sure you wrap the rest up tightly so it doesn’t go hard!
Then I kneaded it and rolled it around until it became pliable and soft. Once this was done, I added half a teaspoon of gelatine powder to the middle of the pile and gradually worked it in. Occasionally pockets of powder burst out, so be careful with it!
Once it was all mixed in, I started separating off little balls of mixture, for each petal.
The formula I used was six large, five medium, and three small petals for each rose.
Each little ball of icing I would roll around in the palm of my hand and make it soft, and then start to flatten it out with my other finger (making sure to keep some icing sugar nearby for dusting, otherwise they stick!). While flattening it out I made sure to push it into a petal shape, with a rounded edge at one end and a point at the other.
Once the petal shape was formed, I would lay the petal down over my thumb to cup it slightly, and pull the curved edge backwards.
For every second flower I made, I would also crinkle the edges of the petal, for some variation.
Once this was done, I would place the petal down onto a piece of foam, for it to dry. Every couple of minutes I would gently press a finger in to the petal to maintain the cup shape.
Once the flower was basically hard I would shift it across to a sheet of baking paper to dry out further.
Once all the petals were dry (an hour or two) I then began to paint the edges with the edible gold dust, by mixing the dust and a small amount of water together. I went about ¾ of the way around each petal, missing only the pointed end.
Once all the petal were painted I would leave them to dry completely, overnight.
After the petals are all completely dry, assembly can begin.
You need to get your tart tins or whatever you are using to hold the flowers while assembling (something round and shallow) and line it with a circle of baking paper in a cone shape.
Then you need to put a dollop of royal icing in the bottom of the cone (about half a teaspoon).
Starting with the larger petals, arrange them to overlap each other in a circle around the edge of the royal icing.
Then the medium sized petals, sticking them into the icing making sure they overlap. Then the last, tiny petals need to go into place. Make sure the petals are angled out so that you can see into the middle of the flower. Using tweezers, insert stamens into the royal icing in the middle, having first cut them to whatever length you want (I had mine quite short).
Quickly make any last minute adjustments to the placement of the petals, before the royal icing sets.
These flowers need to dry out completely before you can attach them to a cake.
I would want to leave them for at least a couple of days, so don’t leave this until the last minute!
Once they are completely dry, you can store them in a box or container and wrap them in tissue paper.
Be careful with them! They are fragile.

The method for bell flowers…
These little fillers made my cake a thousand times better than if I had just had the roses. They filled up all the gaps and covered cracks in the icing wonderfully.
They are also quite easy to make, but you need a lot of them so again, don’t leave it to the last minute!
You need to start with little balls of icing again, whatever size you want but mine were quite small, about the size of a pea.
Work the ball into a cone shape and then insert your pointy object (skewer etc) into the wide end of the cone. Roll it around inside the cone to thin out the edges, until your cone is hollow.
Fold over the edge of a piece of florist wire (maybe 3mm) and poke the wire through the cone so the folded bit is in the centre. Work the icing around this so it stays in place.
Then, using your little scissors, cut five snips evenly into the wide part of the cone to make five petals. Snip the corner off each petal so the flower resembles a star.
Using your fingers, smooth the edges of each petal and flatten them out.
Quickly poke a stamen (again cutting to the required length) into the centre of the flower and roll the end around between your thumb and forefinger to make it stick. I found this part required a bit of extra icing sugar to make it work!
Then you can poke the end of the wire into the florists foam to keep the flower up in the air to let it dry.

Basically, I just arranged the flowers on the cake as I wanted. I put the roses around the edge of each tier, alternating between smooth edged and crinkle edged, trying to keep the gaps even but also trying to cover any flaws in the icing of the cake.
I secured these in place with Royal Icing.
For the filler flowers I had twisted them and some spare stamens together to make little bunches, and attached them behind the roses so they poked out and filled the gaps.
Some of these I left floating in midair, some I stuck the flowers to the sides of the cake.
I had also made some miniature roses with only two circles of petals for the very top tier, which I arranged around my cake topper. And that was it! A beautiful, elegant cake and it had only cost us around $150-$200, including all the ingredients to make the actual fruit cake, cake tins, marzipan and icing, as well as all the materials for the flowers.
You cant beat that!


No comments:
Post a Comment